Affinity Designer Cut Out Tool
Affinity Photo: Extract/Cut Out an Image
In this tutorial, we will learn how to extract or cut out an object from an image in Serif's Affinity Photo, thereby separating it from its original background.
The process involves using the Selection Brush Tool for selecting/tracing out the object and adjusting the settings from the Refine Selection box to refine its edges.
1) Launch Affinity Photo.
2) Click File > Open... and open the image containing the object you want to cut out (you can also press ⌘ + O)

3) In the Photo Persona (default), pick the Selection Brush Tool.

4) Drag over the object you want to extract and trace out a selection. The selection region increases with each drag as Mode is set to Add by default.

5) However, if there is an unwanted spill in selection, change the Mode to Subtract and reduce it.


6) Now the edges of the selection can be much finer, especially the hair against the background. Click on the Refine... button that appear in the context toolbar.

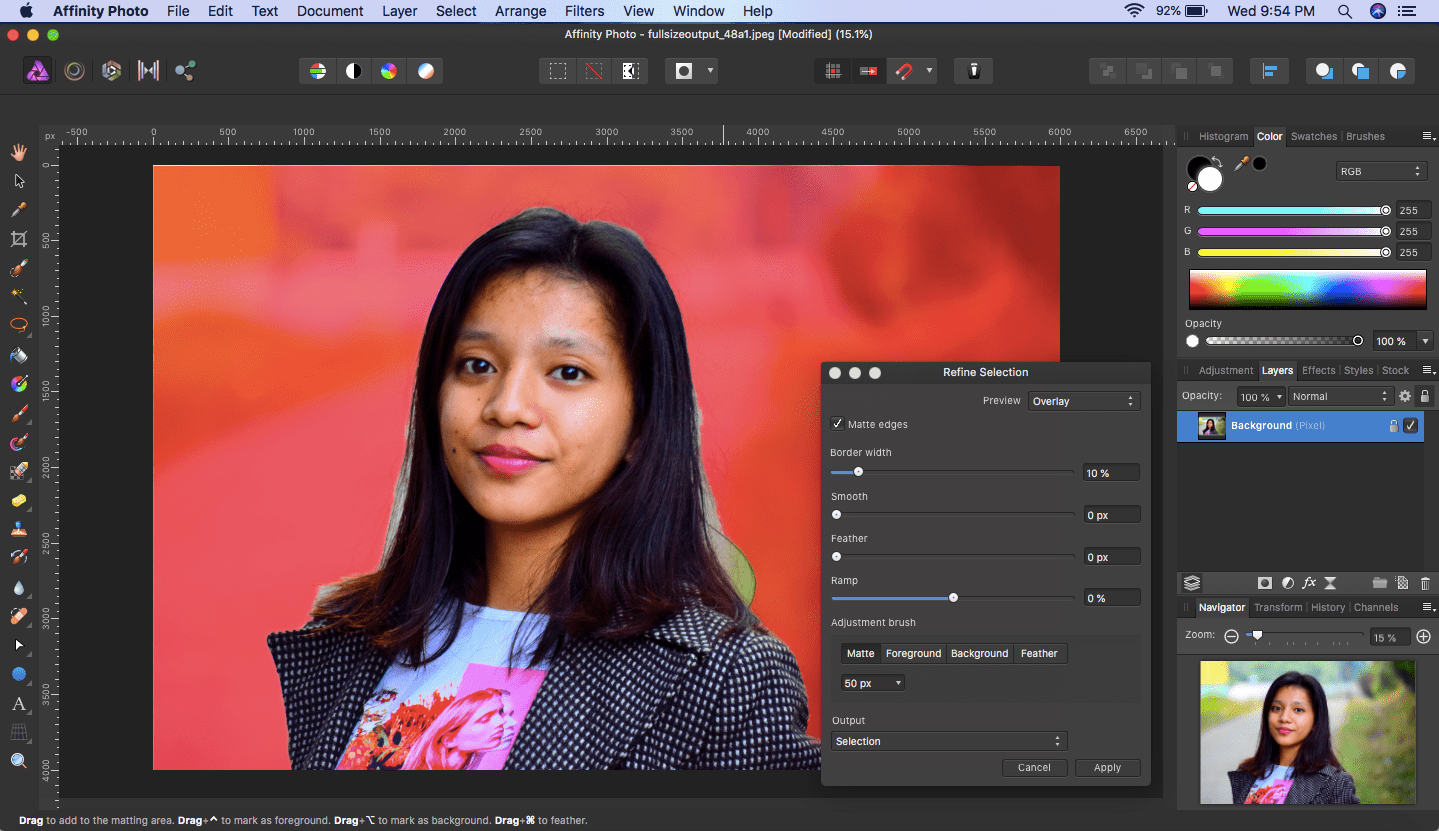
7) A red layer overlays the portion outside of the selected area and the Refine Selection dialog box pops up alongside. As can be seen, we have a very coarse selection along the hair. To achieve a much finer selection, we have to make some adjustments in the Refine Selection dialog box.

8) The Ramp field alters the size of the selection; positive values will enlarge it, negative values will shrink it. Set it to around -20%. Smooth determines the curvature of the selected area's edge. Set it to 3px. Next, we have Feather which sets the softness/opacity at the edge of the selection. Set its value to 5.1px. Lastly, increase the adjustment brush to some 100px.

9) With the adjustment brush, paint over the edges which need to be refined.

10) Now we have a much finer selection. Click Apply.

From here, it is pretty much upto you what you want to do with the selected image.
Place/Paste the Selected Image in a Different Background
If you want to place the selected image in the different background, proceed as follows.
1) Click Edit > Copy.

2) Open the image where you want to place it and click Edit > Paste.

3) The selected image is now placed in a different background. You can do further adjustments on this merged picture as you please.

Export/Save the Selected Image as a PNG
If, however, you want to save the selected image (with transparent background) to work on it later, we can proceed as follows.
1) Click on the Mask Layer, located below the Layers panel.

2) The background layer becomes transparent, leaving out just the selected portion.

3) Click File > Export and bring up the dialog box. The PNG tab will be open by default. In the Area field, select Selection without background and press Export.

Affinity Designer Cut Out Tool
Source: https://scriptverse.academy/tutorials/affinity-photo-cut-out-an-image.html
Posted by: nunezboured57.blogspot.com

0 Response to "Affinity Designer Cut Out Tool"
Post a Comment